Initial Disconnect of Piping
Flow Control Valve Installation
Flow Control Valve: Project Overview
JDI completes a critical upgrade at an Oconee County water treatment facility, focusing on a 12″ piping system essential to daily operations. Our in-house mechanical contractors began by removing four aging flow control valves and actuators, making way for a more efficient and reliable solution.
Once the old equipment has been safely removed, our team installs four new 12″ control valves with automatic actuators designed to improve system responsiveness and long-term durability. The new components are fitted with precision, ensuring leak-free performance.
The project finishes smoothly and efficiently, restoring operations without disruption and delivering a modern system built to last. To see more details, read on below.
Pipefitting Process Details
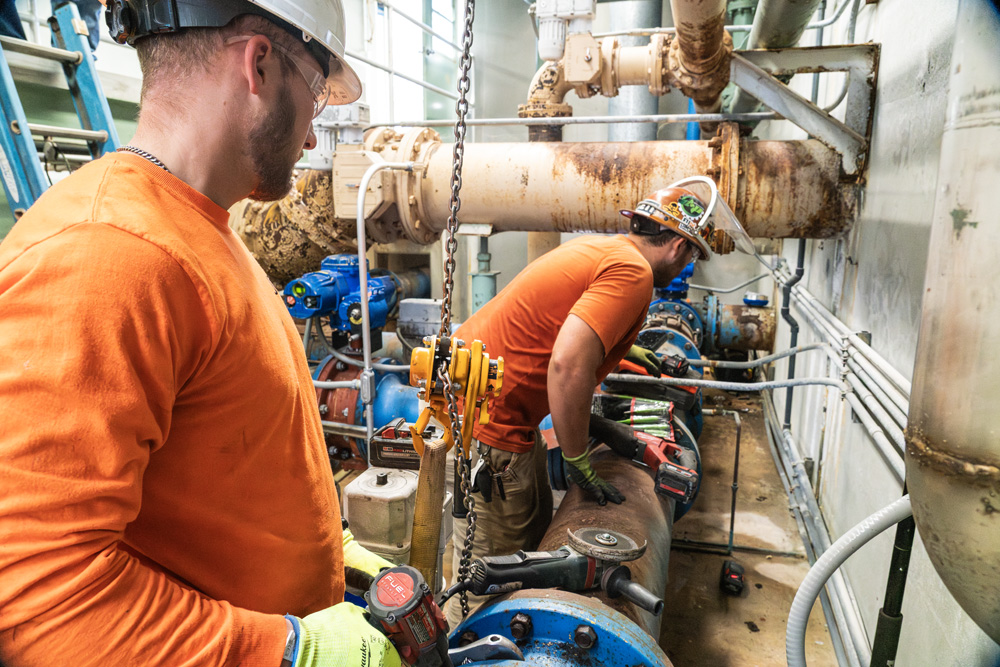
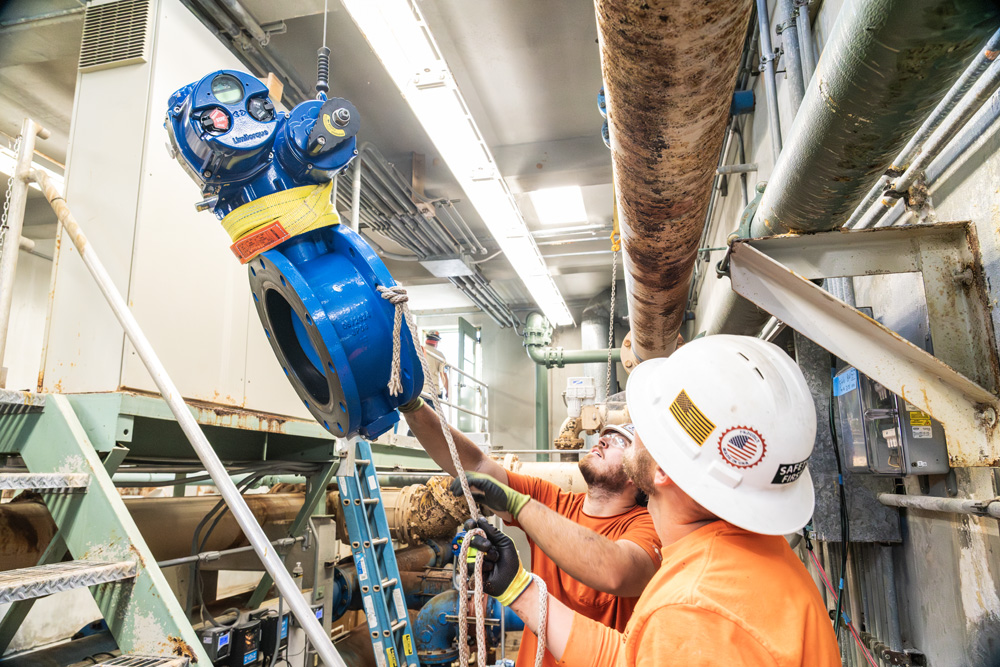
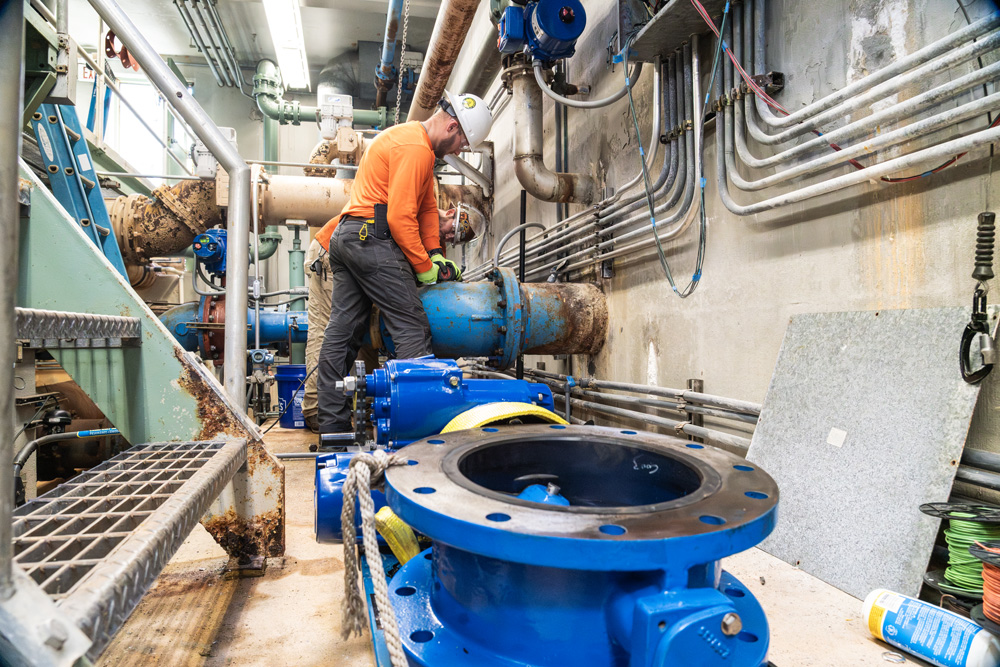
Initially, our team must place the new actuators and control valves on the concrete decking. There, we ready the materials to lower into the piping area where our team will install the components. JDI accomplishes this task by utilizing rigging equipment stationed on the roof.
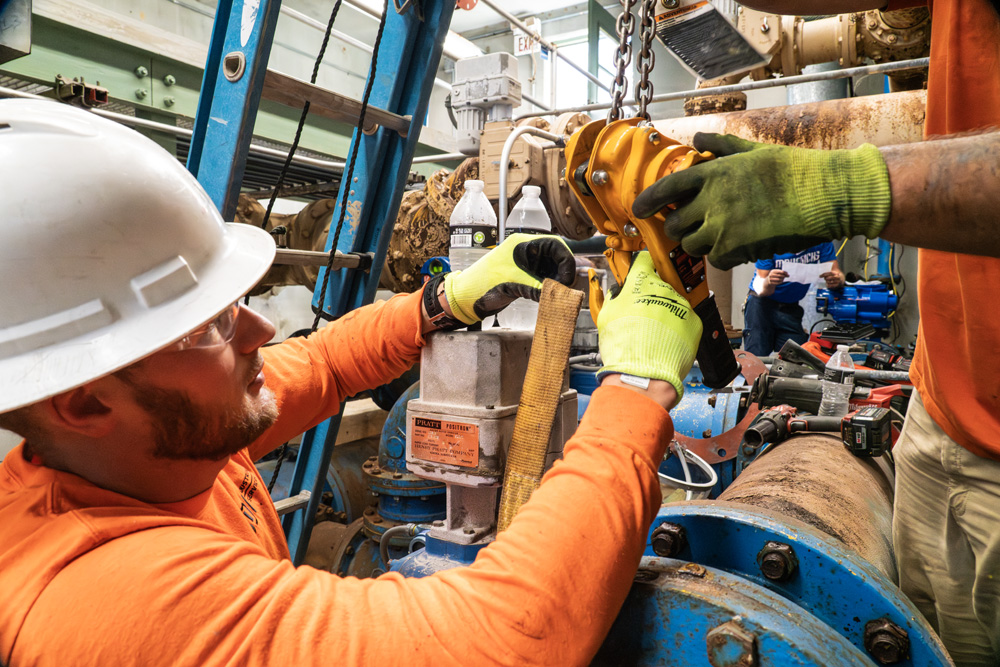
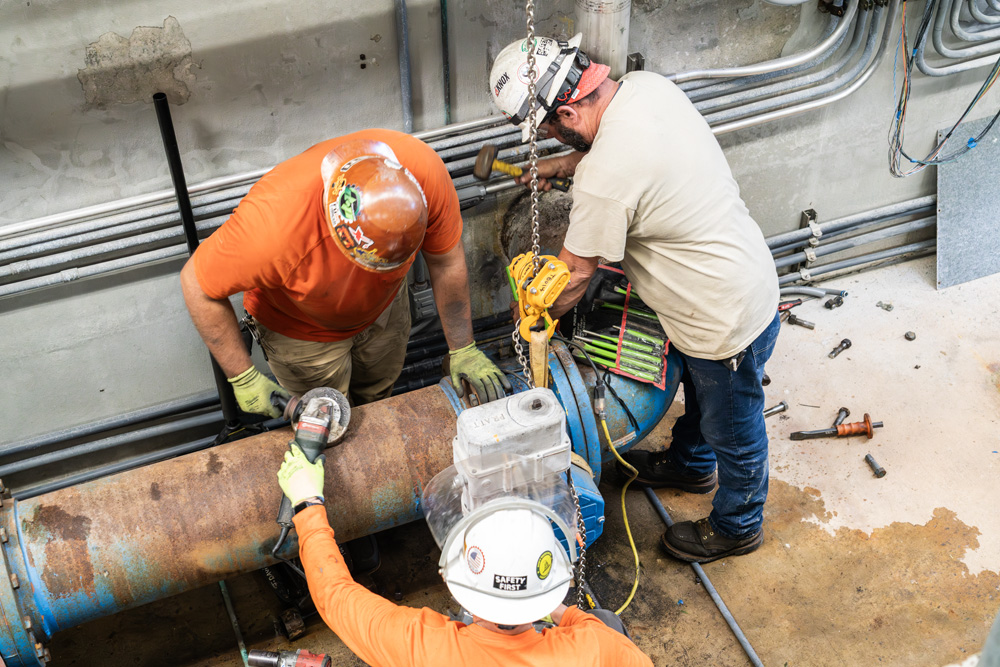
Next, our crew uses a tag-line to guide the assemblies in place. Then they begin to remove the old flow control valves and cut the old bolts off where need be. There are 96 bolts and nuts altogether that our in-house mechanical contractors need to remove.
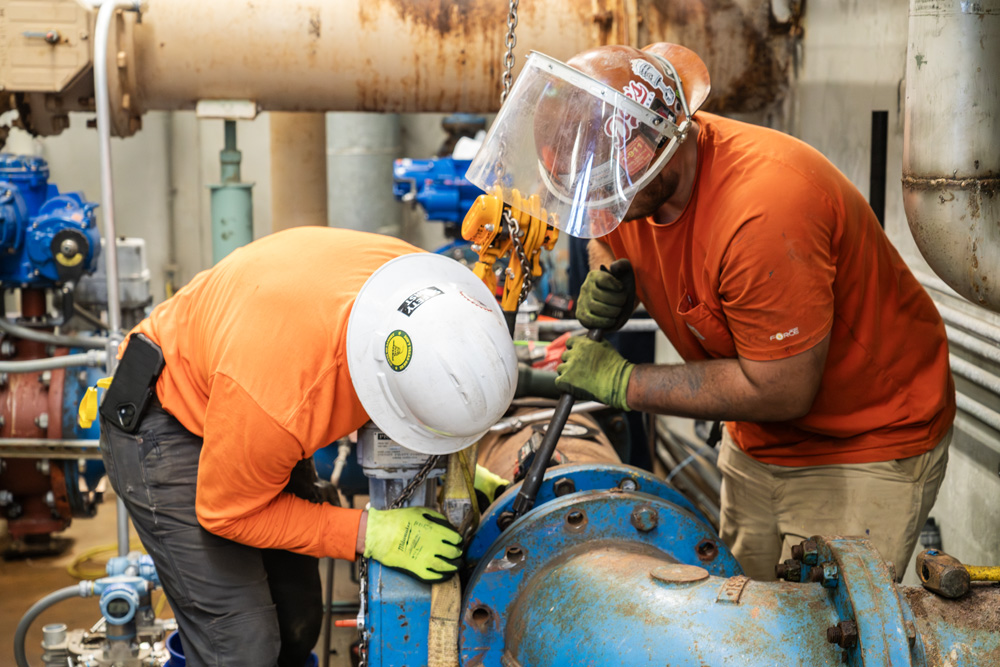
JDI’s crew then rig the old flow control valves and lift each of them out with the rigging equipment. Following this, we lower the new Chalmer and Kubeck valves and Flowserve Limitorque actuators into the area.
Proper pipefitting will avoid uneven gasket loading and will help prevent leaks. It will also help avoid the possibility of damaging, or even breaking, the flange. We also install stainless steel bolts to ensure corrosion prevention.
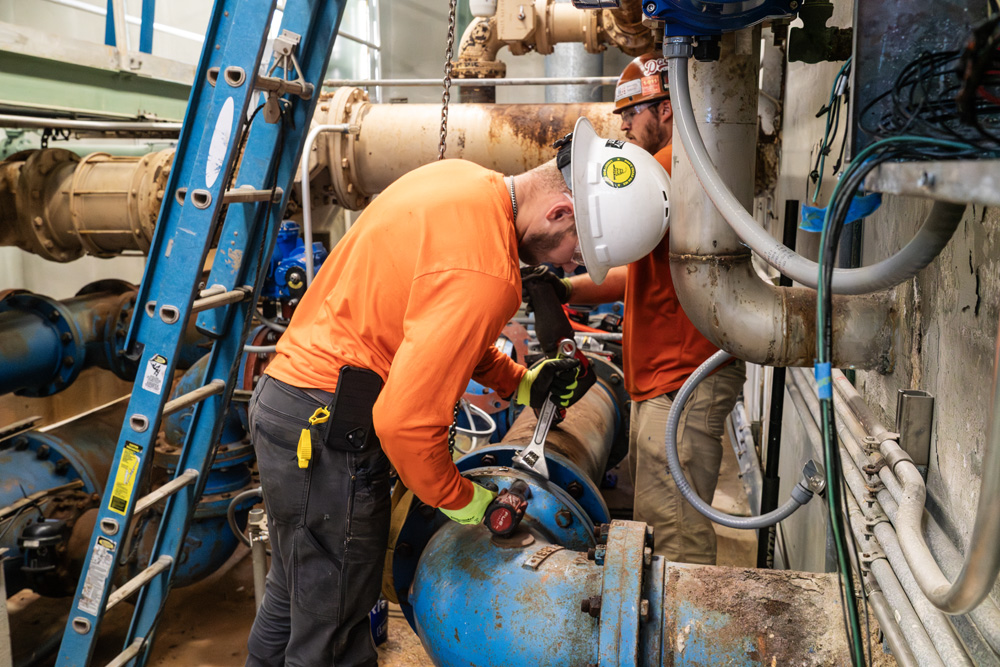
JDI’s mechanical contractors then set the valve into place, fit the pipe ends with the gaskets and stainless steel bolts, and join them together with wrenches. The team torque the pipes appropriately, making sure the gaskets and the pipes align perfectly with the new flow control valve systems.
Flow System: Reconnection & Testing
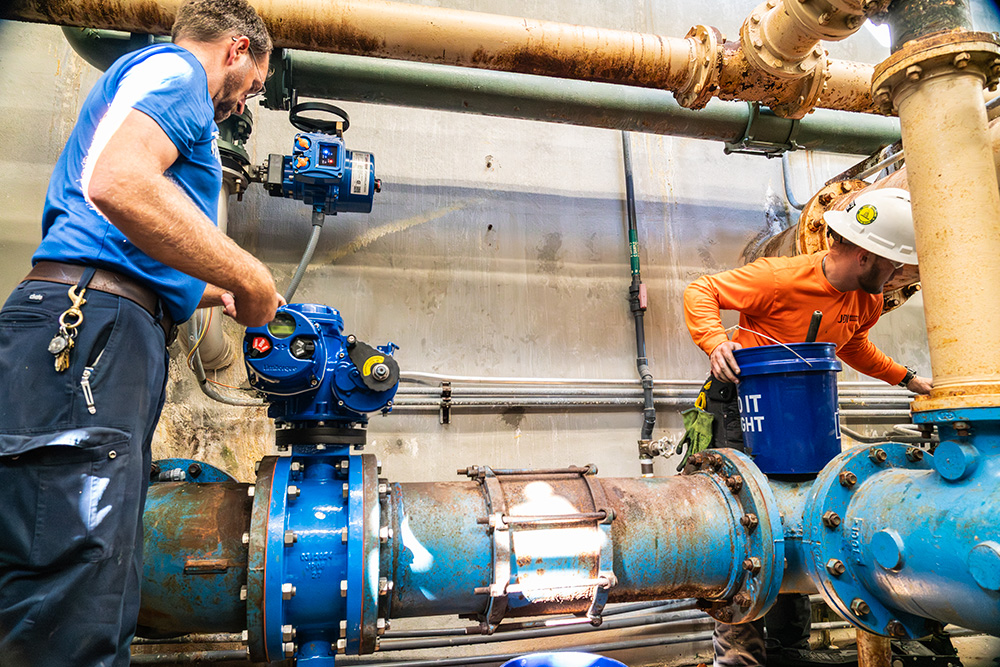
Now that the new valves are in place it is time for the test of success. Before installing, we check for and remove all shipping stops and protective plugs or gasket surface covers. Following that, our crew also check inside the valve body to make sure no foreign objects are present.
Above all, our crew confirms that all of the parts are correct for this system to prevent any kind of failure or accident from happening. This new flow control valve and actuator employs an advanced brushless DC (BLDC) motor which eliminates sparks, reduces mechanical and electrical noise, and dissipates heat better than brushed DCV motors.
Thereafter, we perform a flush and hydro test to ensure the new install is working properly. Lastly, we we perform a leak test around the joints. As a result the project is a success and the facility is able to run at full pressure flow again.
Tasks Included
- Remove (4) existing control valves
- Install (4) 12″ Chalmers & Kubeck automatic control valves to replace existing valves
- Provide & Install (96) 7/8″ x 4″ SS Hex Bolts with nut
- Provide & Install (8) 12″ 150# 1/16″ thick FF Red Rubber Gaskets
- Tri-pod Winch to Lower & Lift New and Old Valves
Results
Conveniently, JDI reconnects the system within two days. This water treatment facility has a small window to make the adjustments, and we are happy to help them return to productivity.
Our mechanical contractors make life easy. Undoubtedly, this project is another example of how we take care of a treatment facility’s needs.
Connect With Our Team
Let’s Get Your Project Started
Reach out to our team to get a quote or start the conversation on your next project. We are dedicated to finding the best solution for your industrial needs.